WPF교육 style
July 12, 2022
2022-07-12-WPF교육-style
목차
01.style이란?
02.실습해보기
02.1 그냥 색상 지정하는 경우
02.2 다른 방식으로 색상 지정하는 경우
0.2.3 타입 구분 방식
03.반복적인 소스를 줄이는 방법
03.1 반복적인 소스를 줄이는 방법 1
03.2 반복적인 소스를 줄이는 방법 2
04.다른 화면에 같이 style 지정하기
05.부모 자식간의 관계
06.Triggers
06.1 싱글 Trigger
06.2 멀티 Trigger
01.style이란?
- 논리적 리소스는 하나의 속성에 해당한다는 제한이 있음
-
WPF에서는 속성 설정 그룹을 Style로 수집하여 여러 요소에 적용할 수 있음
- 선언법
<Window.Resources> <Style ...> ... </Style> </Window.Resources>-
Named Style을 사용시 선언할 때 이름을 지정함
- style 이름을 사용하여 선택한 element에 명시적 적용
-
Targeted style을 사용시 선언할 때 target type을 지정함
- 그런 다음 스타일은 해당 유형의 element에 자동으로 적용
02.실습해보기
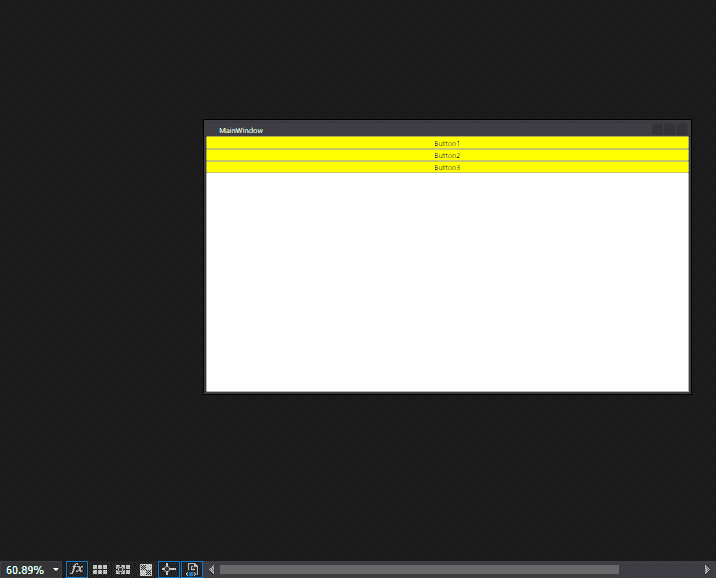
02.1 그냥 색상 지정하는 경우
<Window x:Class="WpfApp1.MainWindow"
        xmlns="http://schemas.microsoft.com/winfx/2006/xaml/presentation"
        xmlns:x="http://schemas.microsoft.com/winfx/2006/xaml"
        xmlns:d="http://schemas.microsoft.com/expression/blend/2008"
        xmlns:mc="http://schemas.openxmlformats.org/markup-compatibility/2006"
        xmlns:local="clr-namespace:WpfApp1"
        mc:Ignorable="d"
        Title="MainWindow" Height="450" Width="800">


    <StackPanel>
        <Button Background="Yellow">Button1</Button>
        <Button Background="Yellow">Button2</Button>
        <Button Background="Yellow">Button3</Button>
    </StackPanel>
</Window>
02.2 다른 방식으로 색상 지정하는 경우
-
1번방식
<Button Background="Yellow">Button1</Button> -
2번방식
<Button>Button1 <Button.Background> Yellow </Button.Background> </Button> -
3번방식
<Button>
  <Button.Content>
      Button1
  </Button.Content>

  <Button.Background>
      Yellow
  </Button.Background>
</Button>
0.2.3 타입 구분 방식
<Style TargetType="Button">

<Style TargetType="{x:Type Button}">- 타입은 구분하는 범주임
-
버튼인지 레이블인지 콤보박스인지 것등등이 type
<Button.Style> <Style TargetType="{x:Type Button}"> <Setter Property="Background" Value="Yellow"/> </Style> </Button.Style> -
Setter로 이용해서 백그라운드하고 색깔을 준다.
<Button> <Button.Content> Button3 </Button.Content> <Button.Style> <Style TargetType="{x:Type Button}"> <Setter Property="Background"> <Setter.Value> Blue </Setter.Value> </Setter> </Style> </Button.Style> </Button> - Property는 단순할 수 있지만
- Value는 복잡하고 태그로 내릴수 있음
03.반복적인 소스를 줄이는 방법
03.1 반복적인 소스를 줄이는 방법 1
-
반복적인것 정의 하는곳
- windows.Resources
-
한개 설정을 통해서 색상값 바꾸는것
<Window.Resources>
  <Style TargetType="{x:Type Button}">
      <Setter Property="FontSize" Value="30"/>
      <Setter Property="Background" Value="Yellow"/>
  </Style>
</Window.Resources>

<StackPanel>
  <Button>Button1</Button>
  <Button>Button2</Button>
  <Button>Button3</Button>
  <Button>Button4</Button>
</StackPanel>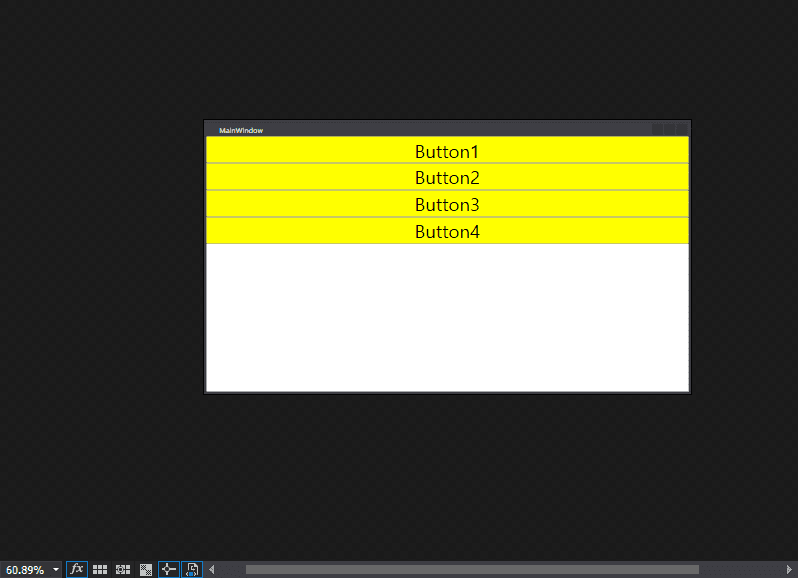
03.2 반복적인 소스를 줄이는 방법 2
<Window.Resources>
    <Style x:Key="Xyz" TargetType="{x:Type Button}">

        <Setter Property="FontSize" Value="30"/>
        <Setter Property="Background" Value="Yellow"/>

    </Style>
</Window.Resources>

<StackPanel>
    <Button Style="{StaticResource Xyz}">Button1</Button>
    <Button>Button2</Button>
    <Button>Button3</Button>
    <Button Style="{StaticResource Xyz}">Button4</Button>
</StackPanel>-
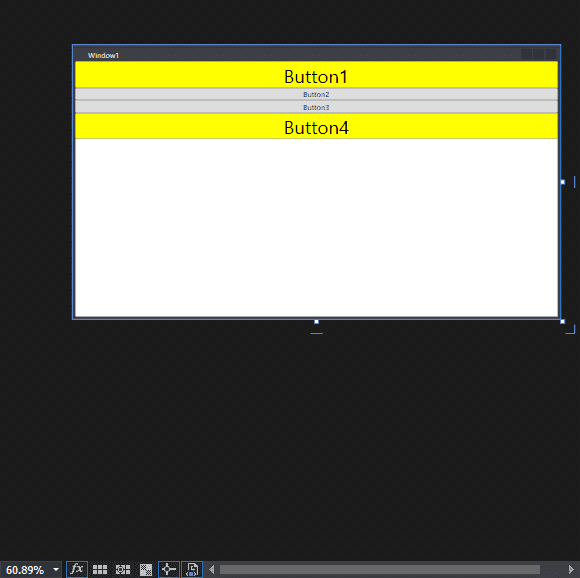
key를 지정해서 개별적으로 적용하기
04.다른 화면에 같이 style 지정하기
-
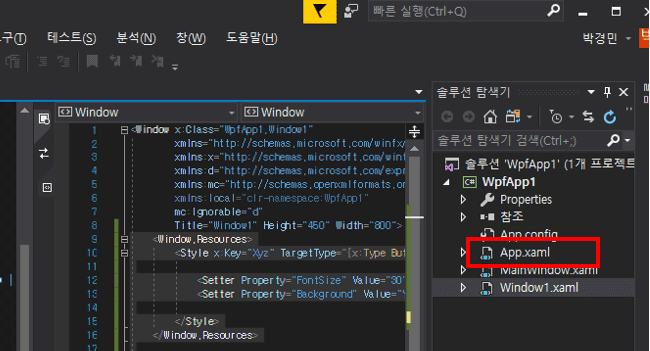
App.xaml클릭해보면 아래와 같이 나오는데
<Application x:Class="WpfApp1.App" xmlns="http://schemas.microsoft.com/winfx/2006/xaml/presentation" xmlns:x="http://schemas.microsoft.com/winfx/2006/xaml" xmlns:local="clr-namespace:WpfApp1" StartupUri="MainWindow.xaml"> <Application.Resources> </Application.Resources> </Application>- 이 안에 필요한 부분을 넣어주면 됨
<Application.Resources> </Application.Resources>- 실제 적용
<Application.Resources>
        <Style x:Key="Xyz" TargetType="{x:Type Button}">

            <Setter Property="FontSize" Value="30"/>
            <Setter Property="Background" Value="Yellow"/>

        </Style>
</Application.Resources>
05.부모 자식간의 관계
- Control 이 가지고 있음 부모가 가지고 있어서 물려받은것
-
Style.Setters 는 그냥 생략을 해놓은것임
- 그럼 왜 그냥 Setter를 썼는가?
-
같은 범주에 썼을때 좀더 눈에 잘들어오거나 명시적으로 표기해야 보기 좋음
- Trigger, resource등이 있음
06.Triggers
06.1 싱글 Trigger
<Style.Triggers>
    <Trigger Property="IsMouseOver" Value="True">
        <Setter Property="FontWeight" Value="Bold">
        </Setter>
    </Trigger>
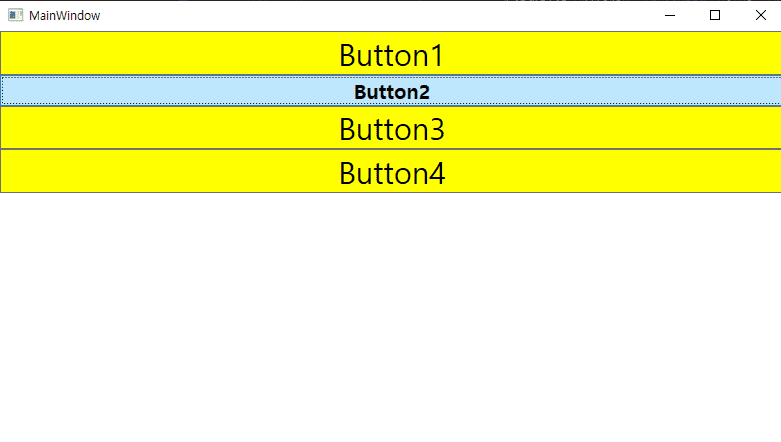
</Style.Triggers>- 마우스 올릴때 그럼 올라갔음을 표시하는 방법으로 사용할 수 있을듯
-
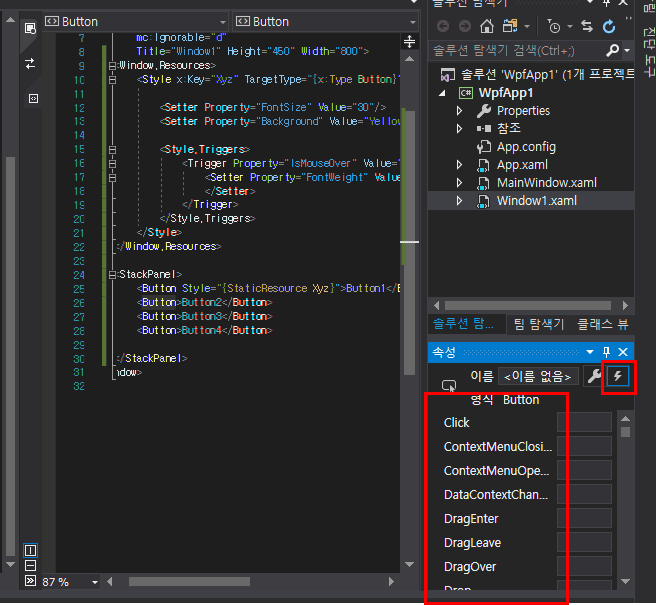
동작 있는지 없는지 내가 어떻게 아는지?
- 번개 표시 보면 속성에 대해서 여러개 나오는데 어떤것이 있는지에 대해서 알 수 있음
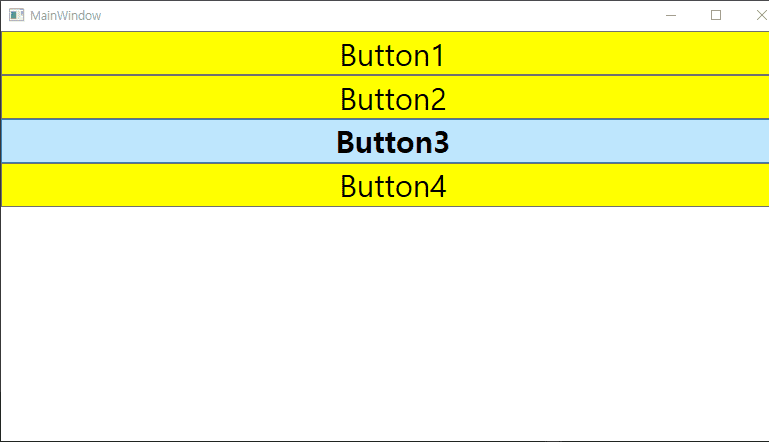
- 마우스가 올라간 부분만 색상이랑 특정 속성이 바뀔 수 있도록 지정
06.2 멀티 Trigger
- 이벤트를 판별하는 조건을 여러개를 주는것
-
<Window.Resources>
      <Style x:Key="Xyz" TargetType="{x:Type Button}">

          <Setter Property="FontSize" Value="30"/>
          <Setter Property="Background" Value="Yellow"/>

          <Style.Triggers>
              <MultiTrigger>
                  <MultiTrigger.Conditions>
                      <Condition Property="IsMouseOver" Value="True"/>
                      <Condition Property="IsFocused" Value="True"/>
                  </MultiTrigger.Conditions>
              <MultiTrigger.Setters>
                  <Setter Property="FontWeight" Value="Bold"/>
                  <Setter Property="FontSize"  Value="20"/>
              </MultiTrigger.Setters>
              </MultiTrigger>
          </Style.Triggers>
      </Style>
</Window.Resources>

<StackPanel>
  <Button Style="{StaticResource Xyz}">Button1</Button>
  <Button Style="{StaticResource Xyz}">Button2</Button>
  <Button Style="{StaticResource Xyz}">Button3</Button>
  <Button Style="{StaticResource Xyz}">Button4</Button>
</StackPanel>